How To Set Up A Gallery Wall Without Using Nail And Hammer
Creating a gallery wall can be a creative and entertaining way to display your favorite paintings and photos. But, if you’re not very handy or if you’re renting and can’t damage the walls, the conventional approach of utilizing nails and hammers might be a difficult chore. But fear not—there are other approaches you can utilize…
Creating a gallery wall can be a creative and entertaining way to display your favorite paintings and photos. But, if you’re not very handy or if you’re renting and can’t damage the walls, the conventional approach of utilizing nails and hammers might be a difficult chore. But fear not—there are other approaches you can utilize to build a beautiful gallery wall without using hammers and nails. We’ll walk you through a step-by-step tutorial on how to set up a gallery wall without the use of hammers and nails in this blog post.
Step 1: Choose Your Photos And Artwork.
Choosing the paintings and photos you want to exhibit is the first step in making a gallery wall. This may be everything from photographs and prints to paintings and doodles. Choose items that go with the subject you have chosen or the color scheme you wish to use. To create a design that is more eclectic, you might also select a number of different sizes and styles to set up a gallery wall.
Layout Your Gallery Wall In Step Two.
Lay down your artwork on the floor before you begin to set up a gallery wall hanging it to get a sense of how it will appear there. This will offer you the chance to test out various designs and configurations until you discover the one that best suits your room. Each element of your artwork can be represented by a paper cutout, which you can then arrange on the floor in various configurations until you find the ideal one.
Step 3: Choose Your Hanging Technique.
It’s time to decide how to set up gallery wall art after you’ve arranged it. You can use a variety of tools instead of nails and hammers, such as hooks, adhesive strips, and picture hangers. Pick the approach that works best for your artwork and your walls because each of these techniques has advantages and disadvantages.
For people who rent an apartment or who don’t want to damage their walls, adhesive strips are a common solution. They support light artwork and are simple to use. A hook and wire are used in picture hangers, a more conventional way, to hang your artwork. They offer a more stable grasp and are perfect for heavy objects. Another choice is hooks, which, depending on their weight capacity, can be used for lighter or heavier items. This is one of the many ways to set up your gallery wall without damaging your wall.
Step 4: Hang The Piece Of Art.
It’s time to begin hanging your artwork once you’ve decided on your hanging technique. To guarantee a firm hold, adhere to the directions that come with your method of choice. To make sure your gallery wall is straight and balanced, make sure you measure and level each piece before hanging it, this is an easier way to set up gallery wall without mistakes.
Step 5: Modify As Necessary.
Take a step back and examine your gallery wall once all of your artwork has been mounted. Make any necessary modifications to make sure that everything is level and spaced equally. Once you are satisfied with the outcome, you may also add more components or rearrange those that are already there.
Consider the weight of your artwork and the surface of your walls when selecting your hanging technique. Picture hangers may need a stud finder to establish a reliable anchor point, while adhesive strips may not adhere well to textured or porous walls.
Make sure to carefully follow the manufacturer’s instructions if you’re utilizing sticky strips. When hanging your painting, apply hard pressure for at least 30 seconds and wait for the adhesive to fully set. Use protective sleeves or coverings when moving or storing your artwork to prevent damage. This will keep your pieces looking their best by preventing scratches or smudges.
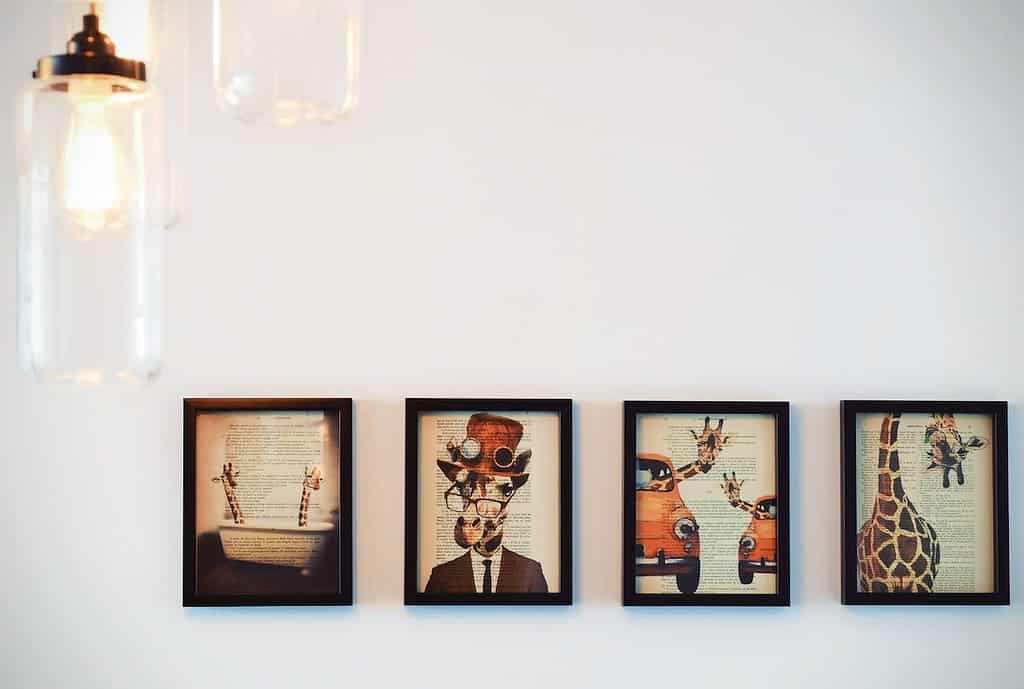
Use frames with a similar design or color to create a unified appearance. For a more bohemian aesthetic, you can also mix and match different frame colors and styles. Use artwork in a variety of sizes and forms to give some visual interest. To create a layered and dynamic aesthetic, you may also use additional decorative items like mirrors or wall art.
Try utilizing a template if you’re having trouble designing the ideal layout for your gallery wall. Before deciding to display your artwork, you can experiment with different layouts using a template made of paper or cardboard that has been taped to the wall.
Without using nails or hammers, you can make a gorgeous gallery wall that creatively and uniquely displays your favorite pieces of art and images by employing these tactics and suggestions.